How To Install And Use Vesta Control Panel (7 steps)
- On March 25, 2016
Vesta, or VestaCP, is an open-source web control panel that is considered to be a great alternative to cPanel. Not only does its security and frequent updates match in quality with that of cPanel, it’s also completely free.
Since most website owners are only familiar with cPanel, making that switch to Vesta might raise doubts despite its cost-saving benefit.
To familiarize our users with the intuitive interface of Vesta, we’ve developed a step-by-step process of how to install Vesta and how use it to host your website(s). It’s designed to keep as simple as possible so even the most average user will be able to use Vesta after reading this through.
In this example, we’ve used a Virtual Private Server (VPS), but it will work just as good on our dedicated servers.
1. Install SSH Client
In your new VPS information email, you’ll find your SSH access information. There you’ll find your Main IP, your login, which is always root, and your password. You’ll need this information to access your VPS via SSH.
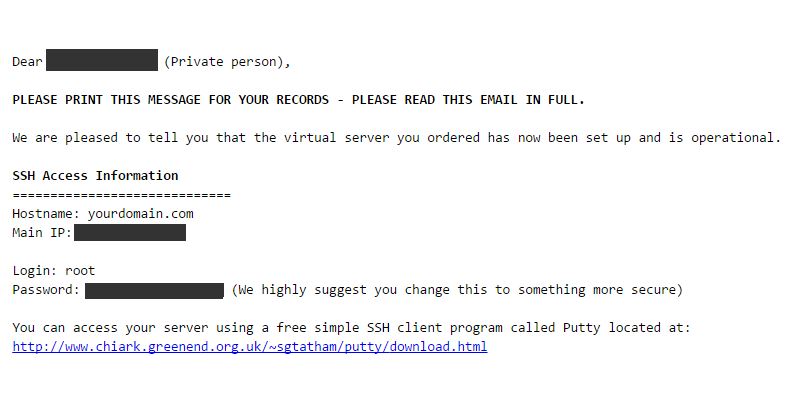
This information is included in our automatic email that you receive upon ordering a VPS. Other hosting providers will give you the same details.
The next step is to get your yourself a SSH client. We recommend using Putty as it is simplistic and does the job well. You can download it by clicking here. Run the installation and open Putty.
2. Choose The Configuration Panel
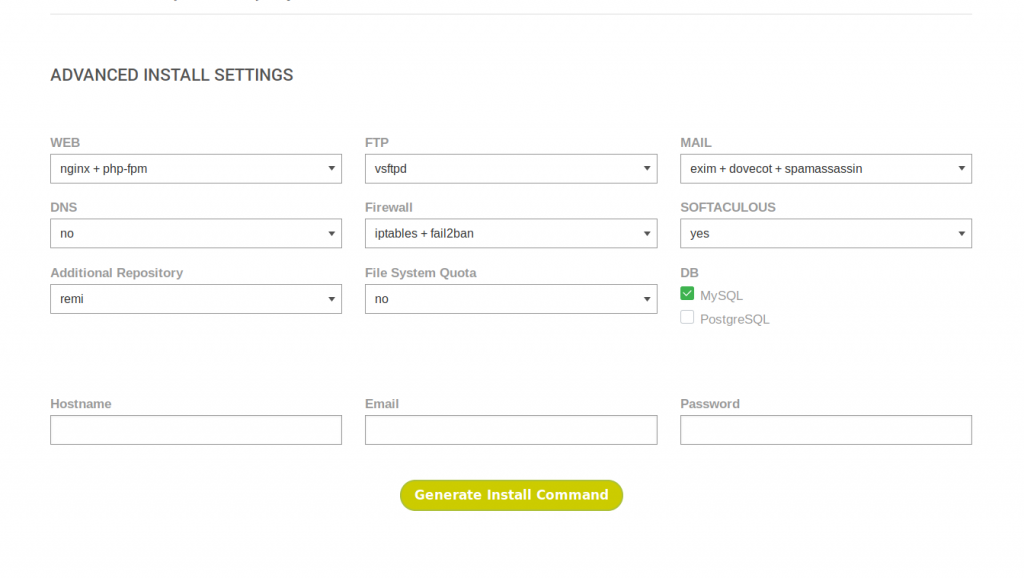
Now, you can use https://vestacp.com/install/ to configure your control panel. After opening this page, go to its bottom.
In this form, you can customize the panel according to your needs. After the initial setup, you will receive three commands that allow you to install the panel on your server. Let’s cover each setting separately.
WEB
Here, you can choose the configuration of your web server.
Apache
Apache was designed as a web server. It uses regular file methods to handle static and dynamic content. In addition to that, it provides additional configuration options for each directory by evaluating and interpreting the directives in hidden files known as .htaccess.
In Apache, modules are loaded and unloaded dynamically. However, Apache handles each user separately, which can create heavy loads on the server.
Nginx
Nginx is an http-proxy server developed by Igor Sysoev. Nginx does not do any hard work – it can only perform asynchronous events. One Nginx workflow does not process one user request (like Apache, for example), but handles multiple requests simultaneously.
Since Nginx is a proxy server, it is easy for it to receive a user request and send it to the backend (for example, php-fpm), while it processes requests from other users. When FPM returns the answer to the first request, Nginx automatically returns the answer to the user.
PHP-FPM
PHP-FPM differs from Apache, as it only relies on PHP. PHP-FPM is not a web server, it’s the easiest and fastest process manager for PHP.
Unlike Apache, it does not use the http protocol, but works with a special fastcgi protocol. Thanks to its simplicity, FPM is able to quickly process the user requests.
In addition to that, FPM is a really smart process manager. It controls the number of running PHP-processes and the frequency of their restart to combat memory leaks and other simple things needed to control the server.
What should you choose?
We recommend using Nginx + PHP-FPM, as this combination provides you with many useful features and saves you memory. In addition, Nginx + PHP-FPM processes requests faster than Nginx + Apache.
However, if you need to use the .htaccess file or you are used to the settings and the operation of Apache, you can choose Nginx + Apache.
FTP
Now, you can choose which version of FTP you want to use. FTP is the standard protocol used to transfer files over networks. You can use free FTP clients such as FileZilla to transfer files.
Vsftpd
A simple FTP server with rigid settings, Vsftpd is easy to install and requires practically no maintenance. The main task of Vsftpd is to secure the file transfer.
ProFTPd
ProFTPd is a powerful FTP server with many useful settings. It allows you to configure a list of IP addresses that can connect, access folders and set up many other options. However, it is not as easy to set up as Vsftpd.
If you need to flexible configurations for FTP connections, we recommend ProFTPd.
What should you choose?
If you do not need flexible settings and you just want to use the FTP protocol, vsftpd is your best choice.
If you need flexible FTP server settings, you should opt for ProFTPd.
If you want to receive mail on your server, you will need to configure your mail client. We always recommend that you use the Yandex mail client rather than receive mail to the domain.
In case you’re unsure what you will be doing with the website or you want to send emails from the server, go with Exim + Dovecot + SpamAssassin.
Exim
Exim is a simple messaging agent that is used to forward messages in the Unix operating systems.
Dovecot
While Exim is used to send messages, Dovecot was developed to receive messages on a special protocol. If you plan to use the server to receive and send mail, you will have to install Dovecot.
SpamAssassin
SpamAssassin is an effective spam filtering tool based on the interaction of key components – the evaluation service, the transport agent and the email template database. It is very easy to use and does not need to be configured.
ClamAV
ClamAV is an open source antivirus engine that detects trojans, viruses, malware & other malicious threats. However, we do not recommend it, because it can create heavy loads on the server without any particular reason.
What should you choose?
If you want to send or receive mail to the domain, use Exim + Dovecot + SpamAssassin.
DNS
We recommend that you use Cloudflare’s DNS servers for your domain. Select Named to avoid potential errors in the future.
Firewall
Iptables
Iptables is a rule based firewall system that is normally pre-installed on the Unix operating systems. It controls the incoming and outgoing packets. By default, Iptables runs without any rules, but we can create, add, and edit the Iptables rules.
Fail2Ban
Fail2Ban is an intrusion prevention software framework that protects computer servers from brute-force attacks.
What should you choose?
For the optimal protection and traffic control, we recommend that you use Iptables + Fail2Ban.
Softaculous
Softaculous is a commercial script library that automates the installation of commercial and open source web applications on a website. Softaculous scripts are executed from the administration area of a website control panel, typically via an interface tool such as cPanel, Plesk, H-Sphere, ISPmanager, DirectAdmin and InterWorx.
Softaculous applications typically create tables in a database, install software solutions, adjust permissions, and modify web server configuration files.
What should you choose?
If you want to install applications quickly and easily, select yes, but please note that SOFTACULOUS is paid. If you don’t need extra load on the server and you can install everything yourself, select no.
Additional Repository
The Remi repository is a repository that contains updated PHP and MySQL packages. It helps update PHP and MySQL versions.
What should you choose?
Installing the repository will have little effect on the server, but it can help you update your PHP versions in the future. We recommend that you install Remi.
File System Quota
Allows you to manage your disk space directly from the control panel.
What should you choose?
Without this add-on, you will not be able to track the amount of space on each domain. We recommend that you install it.
Database
A database is a systematic collection of data. Databases allow you to store and manipulate data as well as facilitate data management.
Postgresql and MySQL are similar, but MySQL has fewer features than Postgresql and it is much easier to use. Postgresql has a large number of features that are not available in MySQL.
What should you choose?
If you do not need a flexible database configuration, select MySQL. If you need a flexible configuration and a wide range of options, choose Postgresql.
Recommended configuration:
- WEB -> Nginx + PHP-FPM
- FTP -> Vsftpd
- MAIL -> Exim + Dovecot + SpamAssassin
- DNS -> Named
- Firewall -> Iptables + Fail2Ban
- Softaculous -> Yes (Please note that Softaculous is paid. Choose no if you do not want to pay.)
- Additional Repository -> Remi
- File System Quota -> Yes
- Database -> MySQL
Now, we have completed the selection of components. We only need to enter the email, hostname (e.g. srv.domain.com; instead of domain.com, use your domain) and the desired password in the fields below.
After that, click on the Generate Install Command button and you will receive the three installation commands.
3. Login to Putty and VestaCP Installation
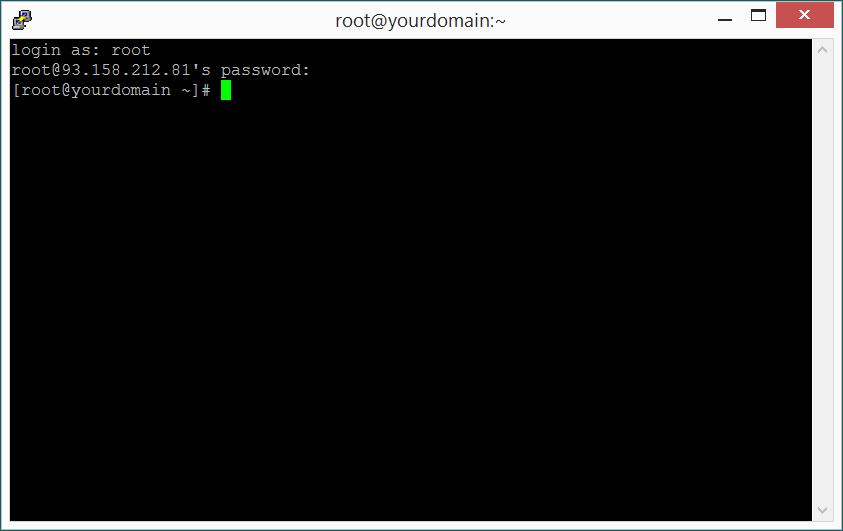
Now that Putty is running, you’ll find a section called ‘Host Name (or IP address)’. Go back to your email, and copy your main IP. Put it in the blank section after ‘Host Name (or IP address)’ and click Open.
A black screen will open. Type in your username, which is root.
Wait a few moments, then type your password. Note that the program will not respond in any way, but rest assured, just keep typing the password and then hit enter after you’ve finished.
You should see this if you have successfully logged in:
Now that you are logged in, enter the command # 2 and press Enter. If you are using Ubuntu or Debian, you might need to first use the following command: apt-get install curl.
Then enter the following command # 3. Press enter again.
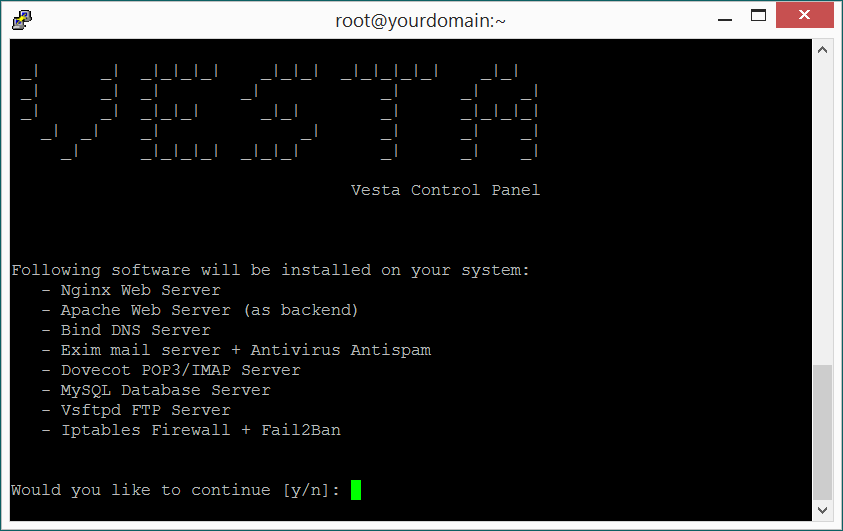
If you’ve done everything correctly, you should see the following screen:
It will ask if you want to continue? Type yes and press Enter. If you have already entered a hostname, email address and password, then you just need to wait. If you have not done this before, the installer will ask you to enter this information.
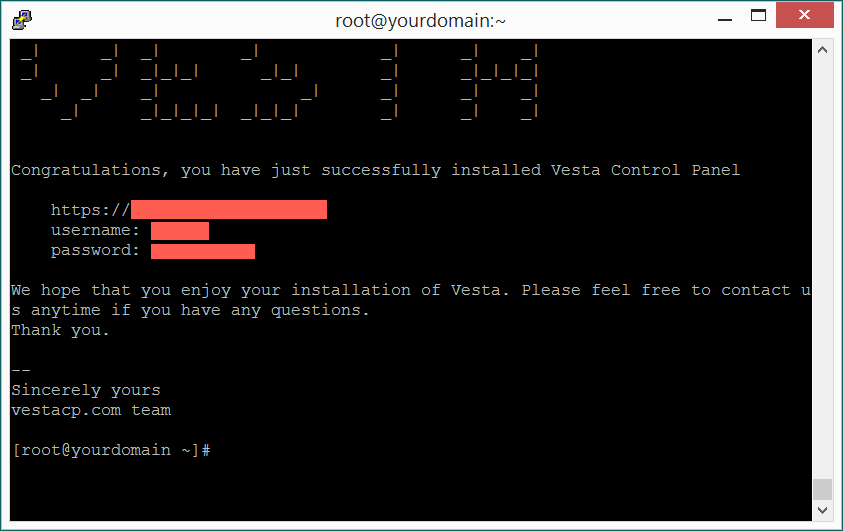
It will continue installing for approximately 5 minutes. Once completed, you should get a screen with a link with your IP, username and password:
Copy all this information somewhere safe. Put the IP link in your browser and login.
4. Create a new user
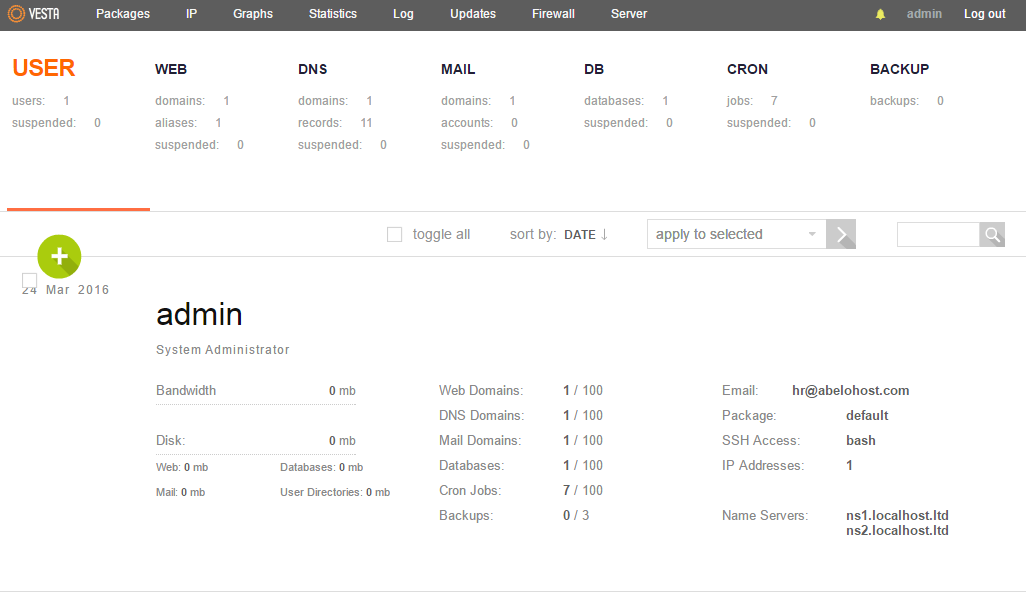
You should see this interface. For now, focus only on the middle bar where it says USER, WEB, DNS, etc.
In the user section, you see that there is already a user created by the name of Admin. That’s standard and we’ll leave it like that.
Click on Web, and you’ll find your domain. Hover over it and delete it in the right hand section. Now click on DB. That is your database. Go ahead and delete it as well.
Now you’d want to create a new user because the username and password of that new user is identical to your FTP details.
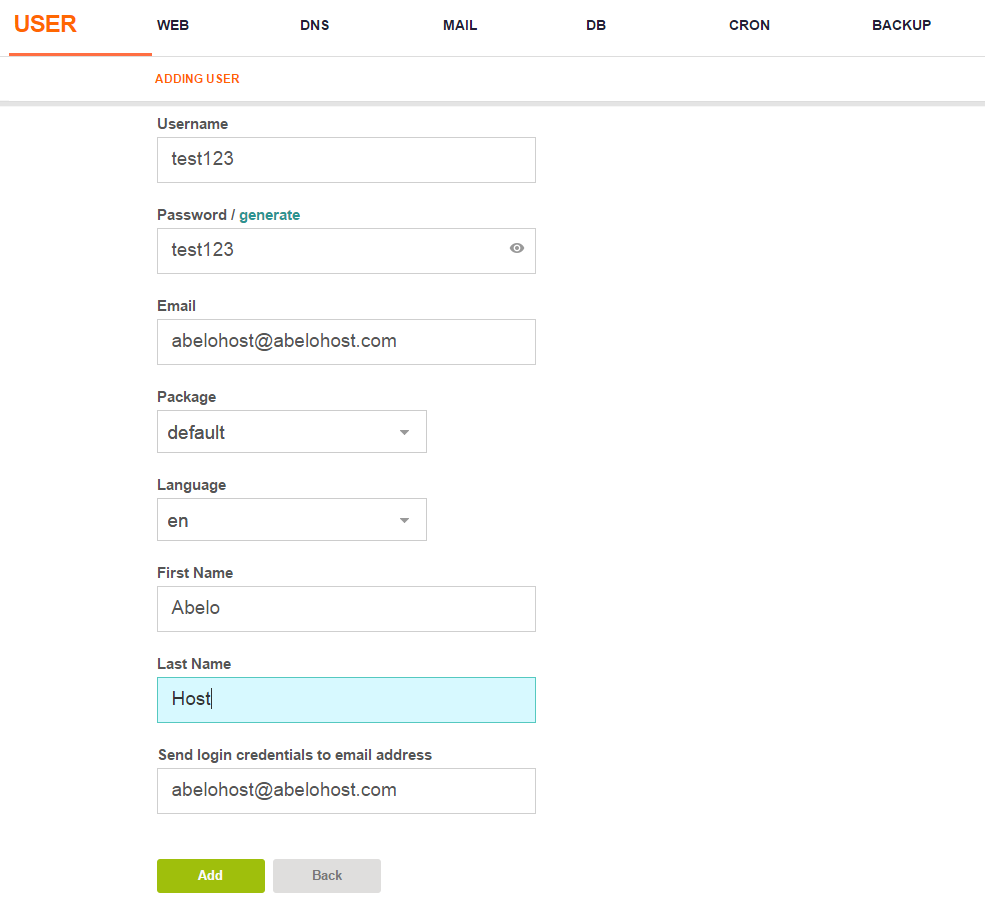
Click on User, and click the + sign. Fill out the section and make sure to save the username and password.
As you can see in the image above, I’ve made a new user ‘test123’ with password ‘test123’. Thus my FTP details will thus be:
IP: Main IP you can find in your new VPS information email.
Username: test123
Password: test123
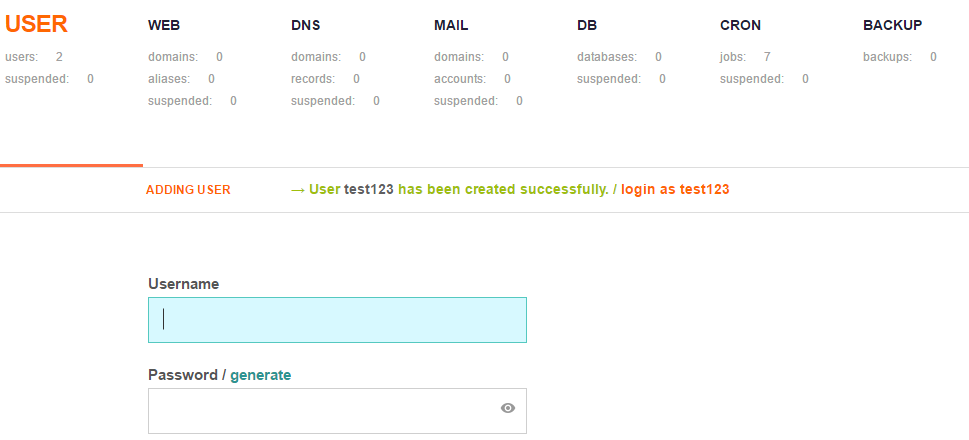
Now you can see that it is asking whether or not you’d like to login as the new user. Click on ‘login as [your chosen username]’.
If you log out of Vesta, you can login back with the new user details and have access to all the websites that you’ve created within that user account.
Note that you can create as many users as you’d like when you are logged in as admin. This gives you the ability to create a new user for every domain that you have.
5. Add a new domain and database
Once you’re logged in as your new user, go over to the WEB section and click on the green + sign to add a new website. Once you’ve done that, head over to the DB section and add a new database. Make sure to save those details.
6. Add Cloudflare nameservers
For nameservers, we use Cloudflare.com exclusively. It’s free and adds a layer of privacy to your website as well. To read about its benefits and for a more detailed tutorial of how to use setup Cloudflare’s free nameservers, click here.
Create a new account if you don’t have one already and login.
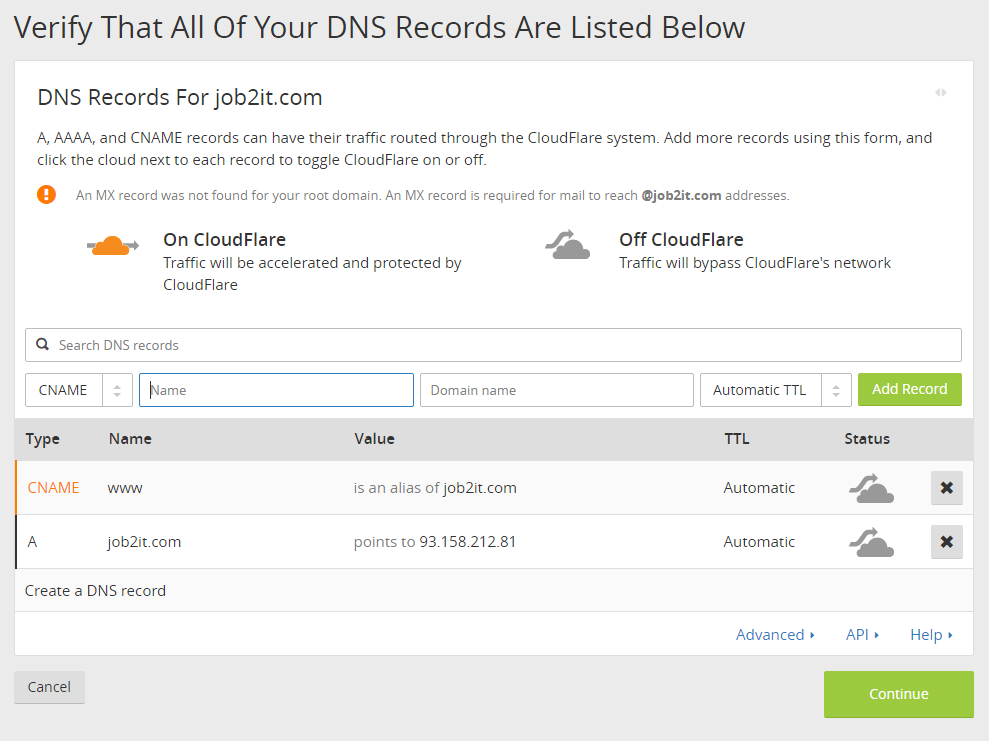
First, add your domain. Once that is completed, you will come to the DNS records section. This is perhaps the hardest part in the tutorial. You’ll need to add a A record and a CNAME record. Fill it out as follows:
A — Name: @ — IPv4 address: the IP address in your new VPS information email.
CNAME — Name: www – Domain name: Your chosen domain name.
It should look something like this:
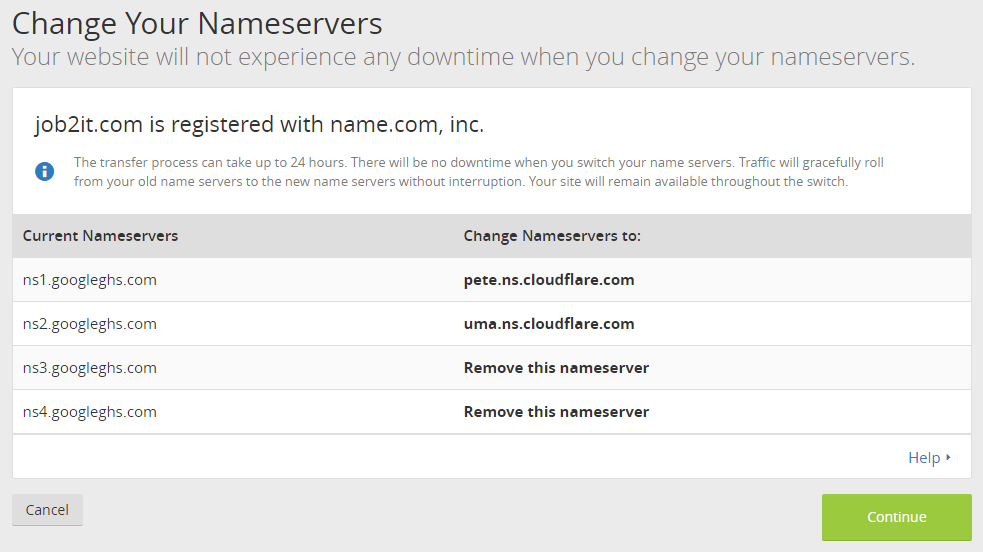
Click Continue, and select the Free Website plan. Click next again and Cloudflare will provide you with the nameservers:
Go to the website where you’ve registered your domain and change its nameservers. Most domain registrars have a ‘Nameservers’ section when clicking on a domain. If you don’t see it, I advise contacting your domain registrar so that they can help you.
7. Add files to your domain via FTP
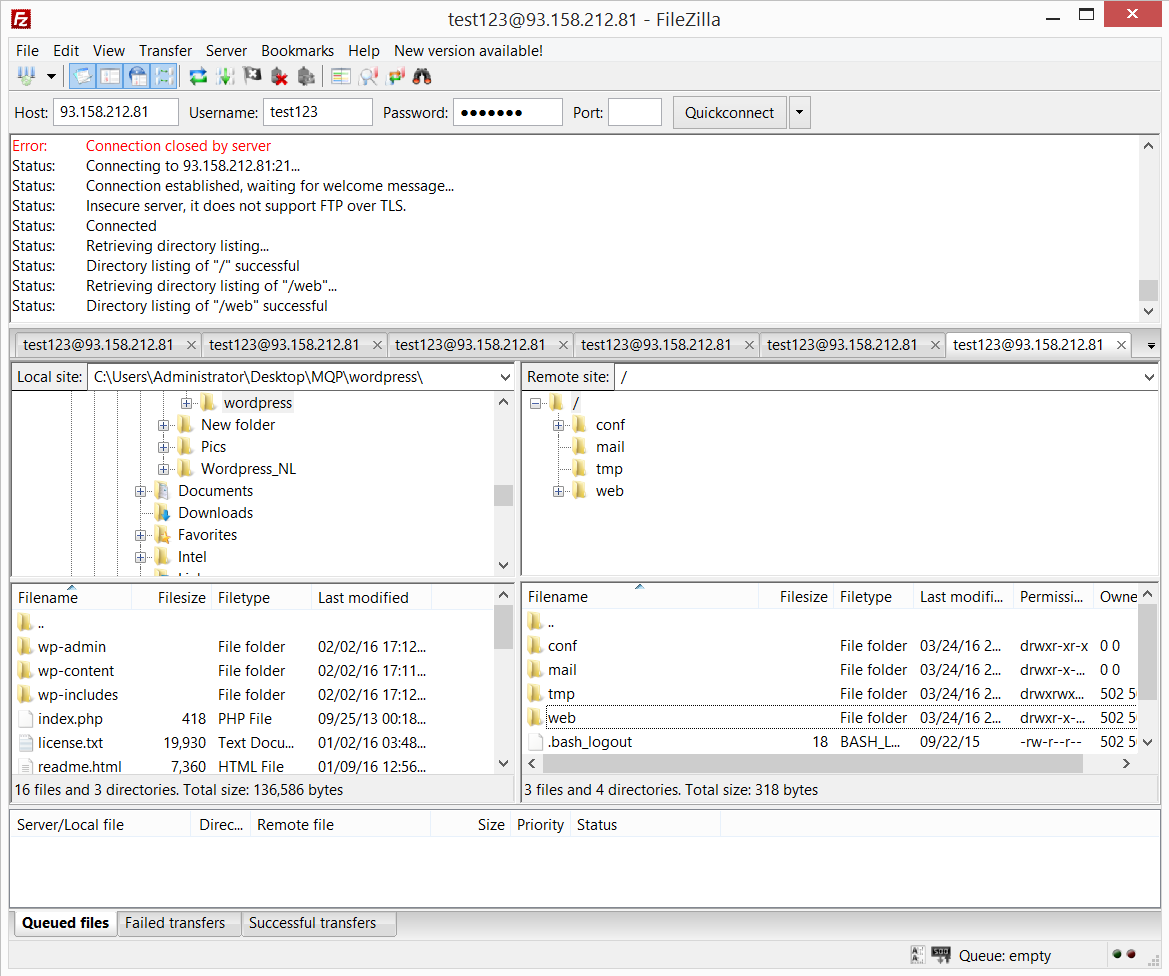
Now that you’ve created the foundation for your website, you can start uploading the necessary files of your website via your newly created FTP account. Login with your user details that you’ve created earlier:
IP: Main IP you can find in your new VPS information email
Username: Username created in Vesta
Password: Password created in Vesta
If you don’t know which FTP client to use, we recommend using FileZilla, which you can download here.
You should see something like this:
If you click on Web in the lower right window, it will show you a folder with your domain. Open it so and you’ll see a list of folders. Click on the public_html and copy all your files to that folder. In this example, we’ll be uploading WordPress files. Just drag all your files from your computer from the left window to the VPS to the right window. It’s that simple.
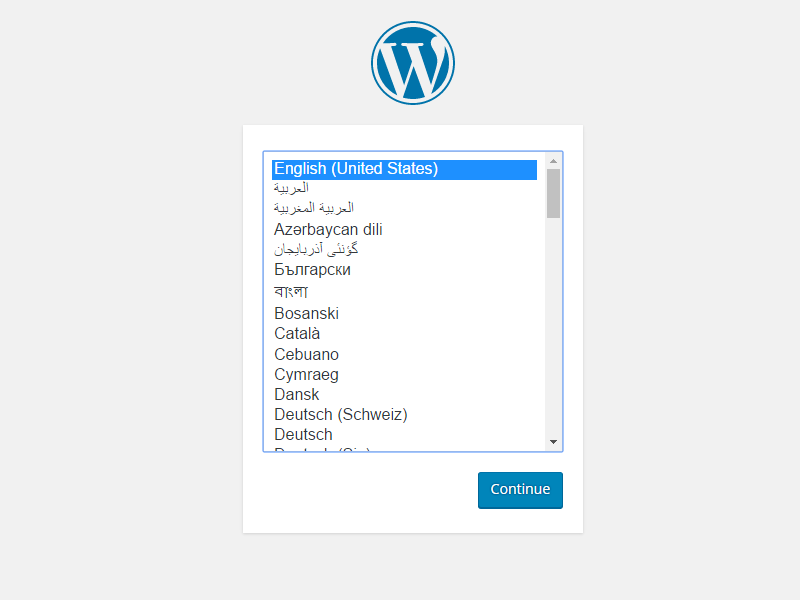
Once all the files have completed uploading, you’ll have to wait until WordPress installer pops up on your domain. It should look like this:
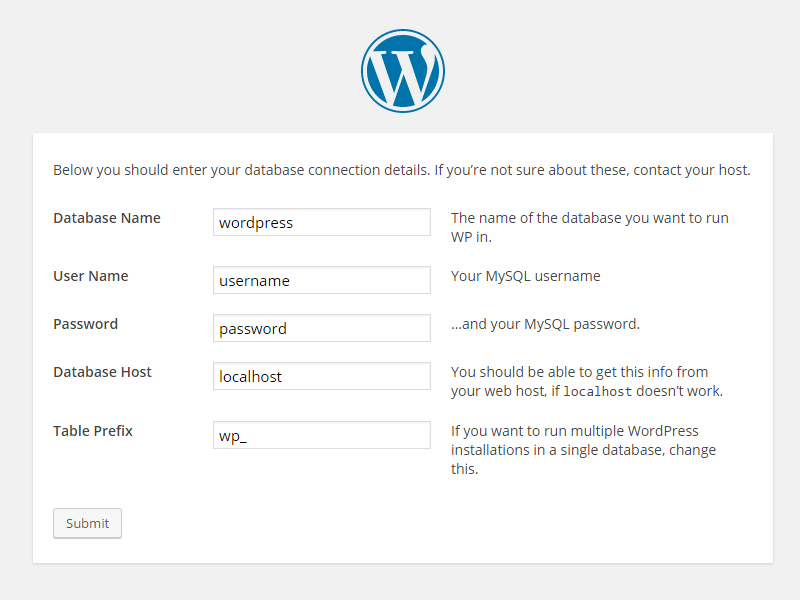
Select your preferred language, and head over to the Database section. It should look like this:
You only have to fill out the Database Name, User Name and Password. Go to the DB section of Vesta where you’ve previously created your database and copy the details. Click on Submit, and if you’ve put the new correct details, it should say:
“All right, sparky! You’ve made it through this part of the installation. WordPress can now communicate with your database. If you are ready, time now to…”
Click on Run Install and fill out the details. Congratulations! You have a successfully setup WordPress via VestaCP on your VPS.
8. Repeat the process for all your websites
Now for every website that you want to host on your VPS, we recommend creating a new user in Vesta. Separating your FTP accounts for each website can protect you from potential hacks and viruses entering all your files. Make sure to login as that user first before you create a new Web and Database.

