

Make Money with Google Ads (3 steps)
- On April 6, 2016
To make money with google ads, you are required to have two things: 1) a legal website that is working properly on a domain name, and 2), a decent number of people visiting your website on a daily basis. If you just started a website and are looking to immediately monetize from it…

and I strongly urge you not to. Not only will you not make more than $0.05/day, the few people that will visit your website may get annoyed by your advertisements. It’s best to wait until you have around 200-500 people visiting your website.
This tutorial will explain in 3 easy steps how you can start displaying Google advertisements on your website.
Benefits of using Adsense on your website
As you may or may not know, Adsense is the name of the program that allows you to display Google advertisements and track your earnings. Here are a few of its benefits:
1. Easy and fast setup
Adsense is simple for beginners to understand. Its user-friendly and intuitive interface helps users setup their account and display their ads on their website. By comparing it to other advertisement networks, Adsense is also much faster. Other ad networks may require additional information, a phone-call verification, or a manual account verification by one of their employees. But Adsense doesn’t require all of this because their system is automatized.
2. Track your earnings
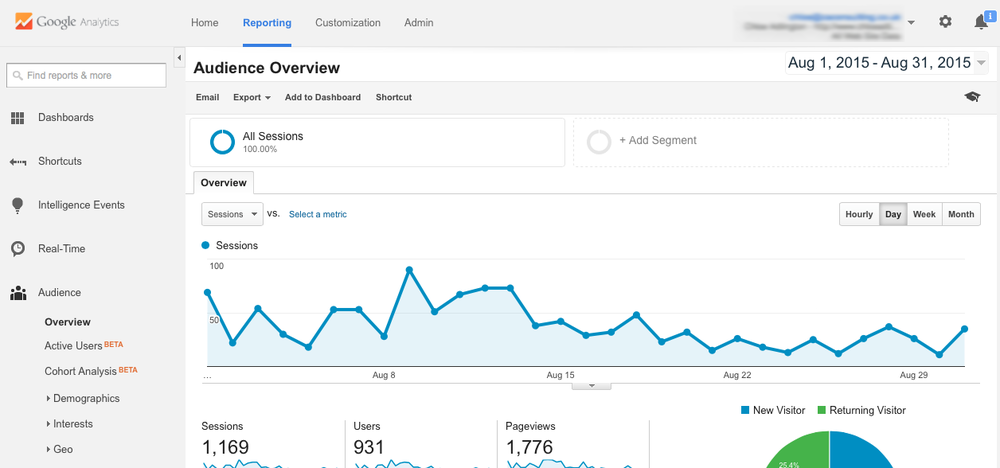
Adsense has an overview page like no other in the advertisement industry. With its graphical interface, it keeps track of your earnings, how well your website is doing, and what your earning estimates are. It has enough tools to help you improve your website in order to earn more.
3. Full customization ability
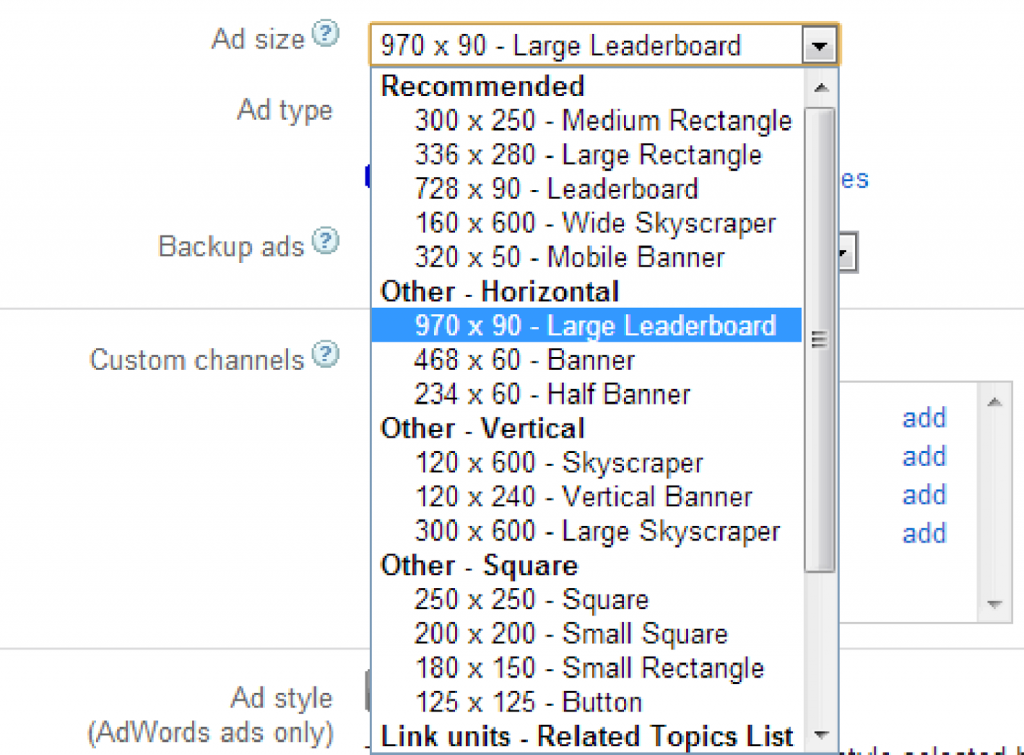
You can take full control over the ad size, ad type, and even the ad style that you want displayed on your website. For example, there are 20 varieties of ad sizes (and shapes) you can choose from.
How to setup Adsense on your website (3 steps)
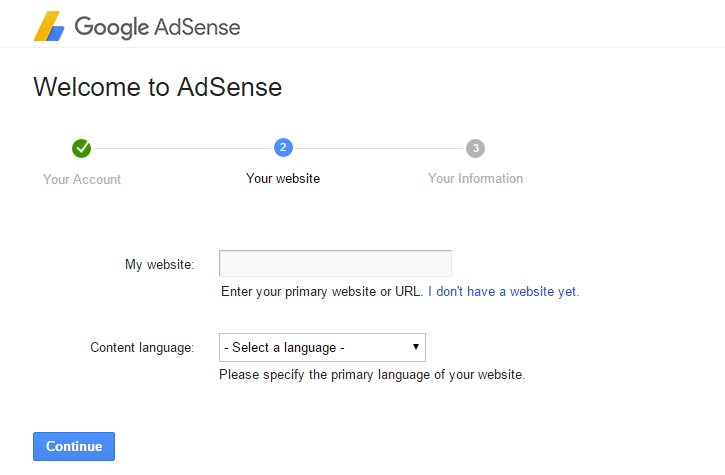
1. Create your Adsense account

Go to Adsense’s homepage. Proceed by clicking on the green “Sign Up Now” button. Continue by signing up with your Google account (@gmail.com). Then enter your website’s URL (e.g. yourdomain.com) and select your website’s language. Lastly, insert your contact information. Make sure it’s all true, or else Google will have a reason to ban you, which they do all too easily if you don’t follow their policies. Click on “Submit“.
2. Create your first ad unit
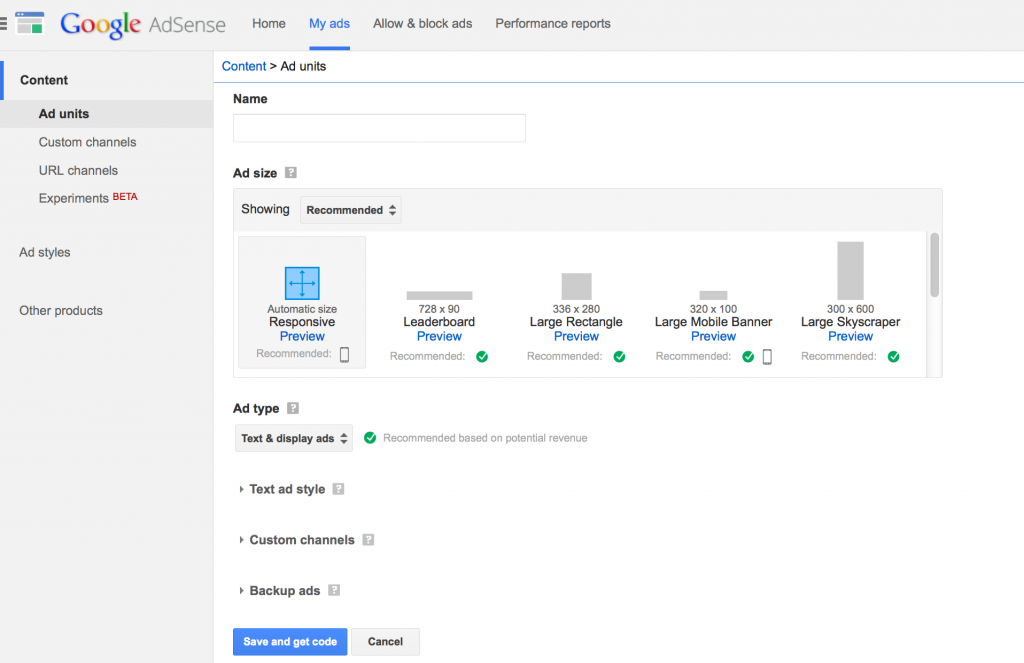
An ad unit is basically an advertisement which properties you can customize and later use for other advertisements units as well. To create an ad unit, click on “My Ads” and then on “+ New ad unit“. You will be required to fill out the the following form:
Name: This is how your ad will be labeled. The best name would be one that makes it immediately clear to which ad it is referring to. Usually the dimensions and the position on the website are enough. For example, ‘728 x 90 top header’ would be a good title.
Ad size: Pick a size that will fit on your website. Play around and see what looks best.
Ad type: Speaks for itself. See which one you find most fitting on your website.
3. Save your settings and add your code
One you’ve clicked “Save and get code“, a message box will pop up with several codes.
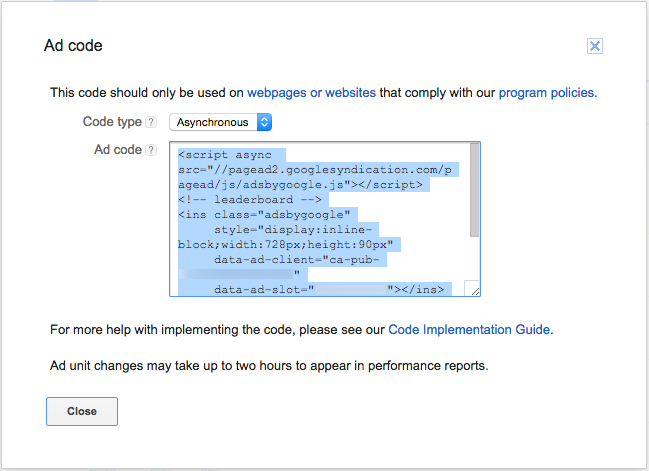
I recommend going with the “synchronous” option as it tends to load more frequently. The next step might be the hardest. You will now have to add the code to your website. If you’re using WordPress, you can use the Widgets section to post it in your sidebar. Some WordPress themes support Google Adsense and already have preconfigured positions on the website.
However, if you have a customized website, we suggest contacting a programmer who can install the code for you. It may require some code knowledge.
Once you’ve installed the code, the advertisement should show up on your website within 24 hours.
You’ll make money everytime someone clicks on the advertisement. Depending on the visitor’s location, the earnings per click will differ. For example, if someone from the United States clicks on the advertisement, you’ll earn more than if someone clicks on an advertisement from Malaysia. That’s because ad publishers pay higher for American clicks than for Malaysian clicks.
The more visitors you have, the more clicks you get, which means that you’ll earn more.