

How to Manually Setup WordPress on Shared Hosting (4 Steps)
- On March 26, 2016
WordPress is an open-source content management system (CMS) developed to build websites. With millions of available templates, an intuitive backend interface, and total customization ability, Wordpress has grown to be the most popular web development application in the world. In this tutorial, we’ll provide a step-by-step tutorial on how to setup WordPress manually on shared hosting where cPanel is already preinstalled.
Note that AbeloHost has WordPress setup as a one-click application, which means you can install WordPress simply by clicking on its icon in cPanel. So if you’re hosting with us, or you want to host with us, this tutorial is not mandatory. You can find more information here.
1. Login via a FTP client
FTP is a gateway panel to access all your website files. It can be understood as an online map. To access it, you first need to find your FTP details.
Once you’ve ordered shared hosting, you will receive an email with your cPanel login details and a server IP address.
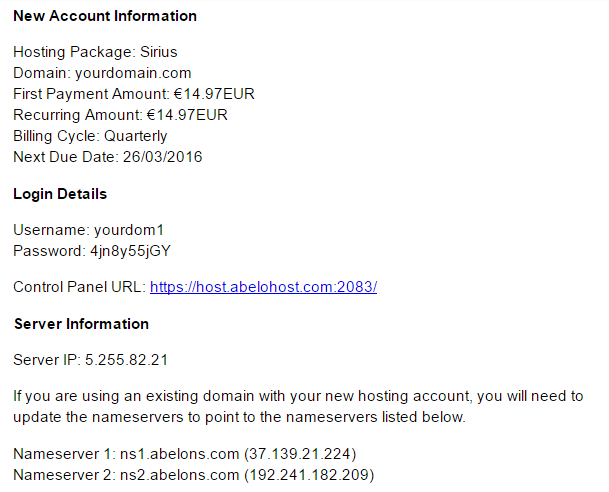
Your cPanel login details are the same as your FTP login details. In this example, my FTP details are:
Server IP: 5.225.82.21
Username: yourdom1
Password: 4jn8y55jGY
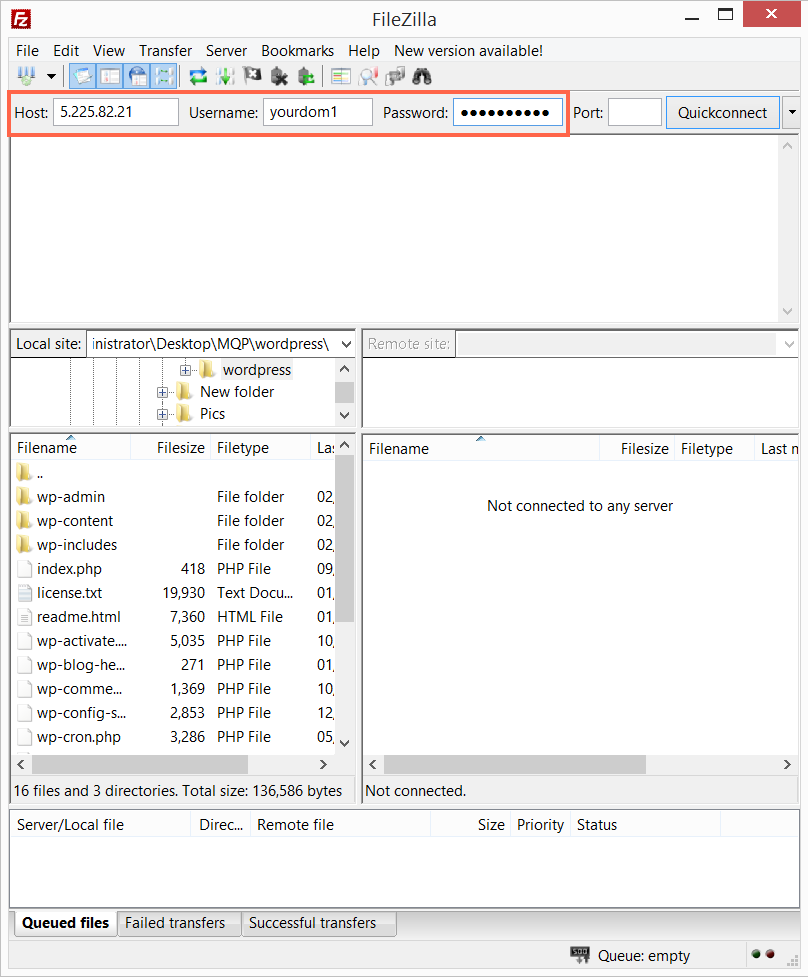
To continue, you’ll need to install a FTP file manager. Even though cPanel has a file manager, we highly suggest installing FileZilla to your desktop. It’s much easier to use and a lot faster as well. You can download it here.
Run it and open it. Now put your FTP login details in the upper section like so:
Once you’ve successfully logged in, a list of maps will open in the right window. Open the public_html map.
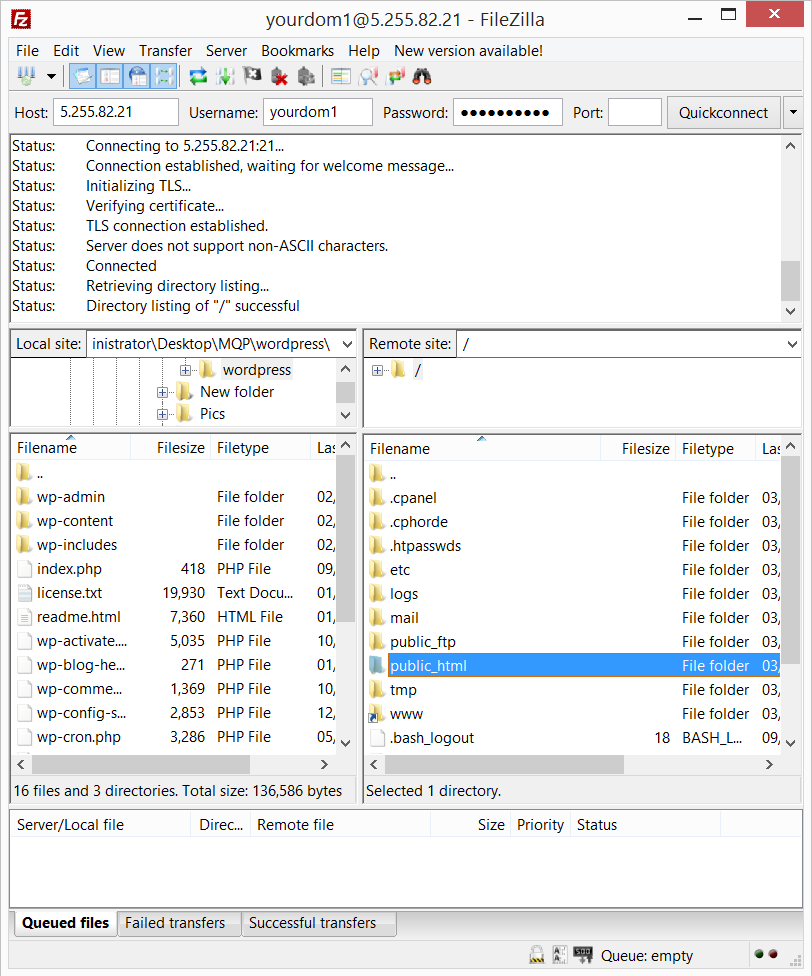
Remove all its content by selecting all, right-clicking and choosing Delete.
2. Upload WordPress files
Go to WordPress’s official website and download their latest version. It will download in .zip format, so you’ll be required to unpack it in your chosen destination. Once that’s done, locate the map with the WordPress files that you’ve just unpacked in the left Window of FileZilla and select all like so:
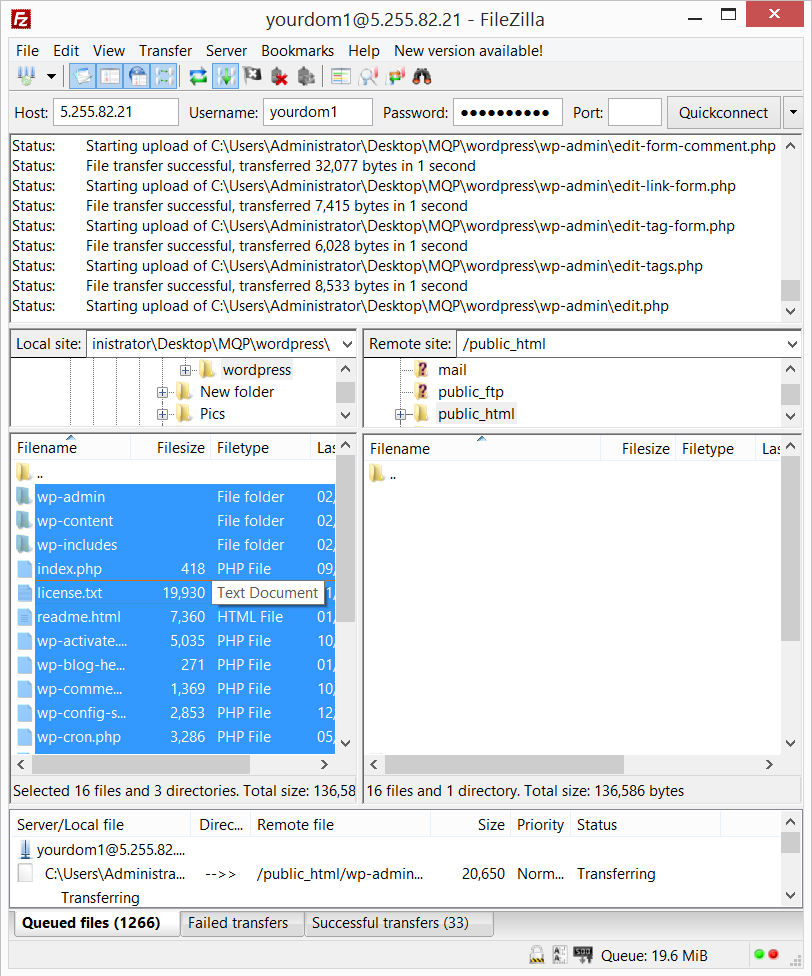
Then just simply drag the files to the right inside your public_html map. Since there are around 1300 files that have to be uploaded, it should take around 5 – 10 minutes. In the meantime, you have to create a new database.
3. Create a database in cPanel
Login into cPanel with the login details you’ve received in your email after you’ve purchased shared hosting. Locate the ‘MySQL Database Wizard’ option in the Databases section. Click on it and fill it out. It doesn’t matter what you choose as your database and username, as long as you save it somewhere secure. Your complete database details should look something like this:
Database: yourdom1_database
Username: yourdom1_user
Password: *H&^h3aLKns
3. Install WordPress
Once FileZilla completed uploading your WordPress files, type your domain name in your browser. Select the language that you want WordPress to display as, and click Continue. It will ask you to enter your database connection details. Fill it out as follows:
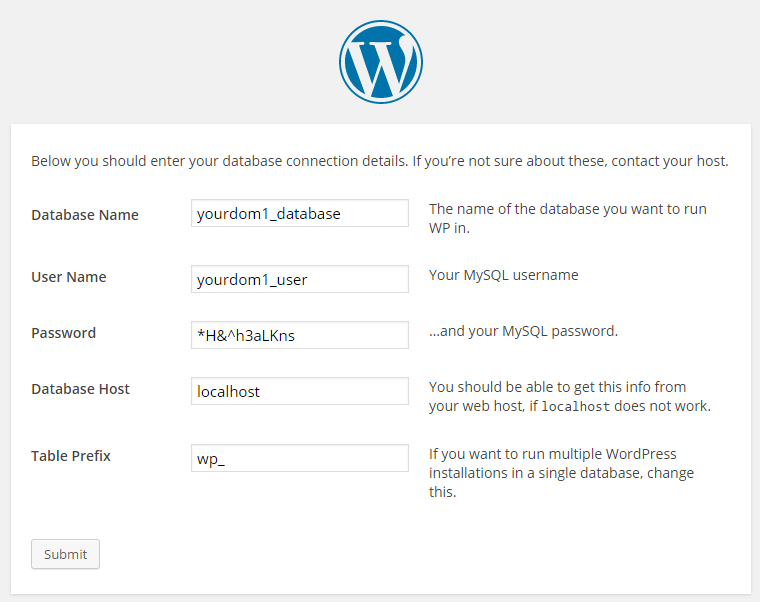
Do not make any changes to Database Host and Table Prefix. Click submit. If you’ve put the correct details, it will ask you to run the install.
4. Name your website and create an admin user
Once you’ve clicked on Run Install, you’ll find yourself on the following page:

Site Title: This will be the title of your WordPress website. You can easily change it at any time later.
Username: The username will be used to access WordPress at yourdomain.com/wp-login.php . Most people use Admin as their username.
Password, twice: This will be your password to access yourdomain.com/wp-login.php. Don’t create an easy password as WordPress is subject to a lot of hacks.
Your E-mail: This will be the email that will be attached to the WordPress website. Make sure the email is secure and only accessible by you since you can easily reset the password of your website using your email.
Privacy: If you don’t want search engines like Google to index your website (yet), go ahead and unselect that option.
Once you’ve entered all the information, click Install WordPress, and head over to yourdomain.com/wp-login.php. Login using the username and password that you’ve just created.
You’ve now successfully intalled WordPress on your domain. A preliminary website should already be on your domain.